Promo code APP3 – £3 discount on your first order in app
  Free delivery for orders over £49


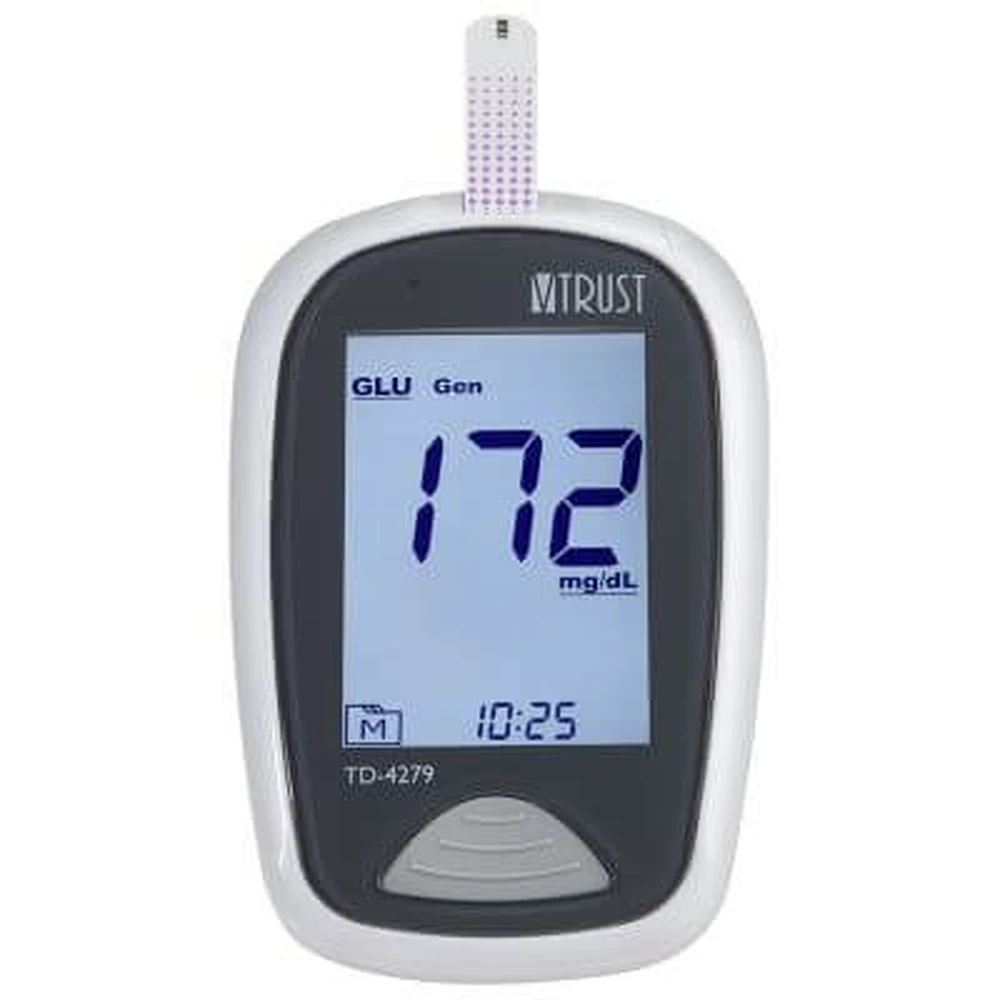
Complete instrument vtrust td-4279
Complete instrument vtrust td-4279
Description
VTRUST TD-4279
Monitoring system
blood sugar and beta-ketones
DescriptionThis system is intended for use outside the body (in vitro diagnostic use) by diabetics at home and by healthcare professionals in clinical settings to help monitor the effectiveness of diabetes and beta-ketone control.
The system is intended for use for the quantitative measurement of glucose (sugar) in fresh whole blood samples taken from the fingertip.
Professionals can use the system to test capillary, venous, and arterial blood samples; home use is limited to testing capillary whole blood.
Specifications
| Exemplary | TD-4279 B |
| Dimensions and weight | 96 (L) x 61 (W) x 26 (H) mm 67.2 grams |
| Diet | Two 1.5 V AAA alkaline batteries (enough for approximately 1,000 measurements) |
| Display | LCDs |
| Memory | 1,000 results, including date and time |
| External output | Bluetooth |
| Tape insertion detection | Automatic |
| Sample detection | Automatic |
| Countdown | Automatic |
| Automatic shutdown | After 2 minutes of non-use |
| Temperature warning | Automatic |
| Operating conditions | 10°C to 40°C (50°F to 104°F) relative humidity (non-condensing) below 85% |
| Meter storage/transport conditions | -20°C to 60°C (-4°F to 140°F) relative humidity below 95% |
| Storage/transportation conditions of the tapes | 2°C to 30°C (35.6°F to 86°F) relative humidity below 85% |
| Unit of measurement | mg/dL for glucose mmol/L for beta-ketones |
| Measurement range | 20 to 600 mg/dl for glucose 0.1 to 8.0 mmol/L for beta-ketones |
How to use
Before using the instrument for the first time or when changing the battery, you must check and update the settings.
Blood sugar test
The meter offers four measurement modes: General, AC, PC, and QC. You can switch between these modes: Start with the meter turned off. Insert a test strip to turn on the device. The screen will show a flashing drop symbol and “Gen.” Press the button to switch between General, AC, PC, and QC modes.
Beta-ketone test
The meter offers a single measurement mode “Gen”. Start with the meter turned off. Insert a test strip to turn on the device. The screen will show a flashing drop symbol and “Gen”.
Test with control solutions
Control solutions contain a known amount of glucose or beta-ketones that react with the test strips and are used to ensure the proper functioning of the glucometer and strips.
Perform the control solution test when:
- use the meter for the first time;
- at least once a week, regularly check the test strips and the glucometer;
- start using a new bottle of test strips;
- you suspect that the strips or the glucometer are not working properly;
- the blood glucose test results are not consistent with the patient's feelings or the results are considered to be inaccurate;
- to practice the test;
- if the meter has been dropped or damaged.
Test strips, control solutions, a lancing device, or sterile lancets may not be included in the kit (please check the contents on the product packaging). These can be purchased separately. Make sure you have everything you need to perform a blood glucose or beta-ketone test beforehand.
It is recommended that the control solution test be performed at room temperature (20-25°C). Before performing the test, make sure that the control solutions, meter, and test strips are within this specified temperature range.
Insert the test strip into the meter to turn it on. Wait for the device to display the test strip and blood drop symbol.
Press the button to mark the test as a control solution test. When “QC” is displayed, the meter will store the test result in memory under “QC.” If you press the button again, “QC” will disappear and the test will no longer be a control solution test. When testing with control solution, you must mark it so that the test result is not confused with stored blood glucose test results. Otherwise, your blood glucose test results will be mixed with your control solution test results.
Shake the control solution bottle well before use. Discard the first drop and apply the second drop to the tip of the bottle cap. Touch the drop to the absorbent hole on the test strip inserted into the meter. After the confirmation window on the test strip is completely filled, the device will begin the countdown.
To avoid contaminating the control solution, do not apply it directly to a strip.
After the countdown to 0, the control solution test result appears on the display. Compare the result with the range printed on the test strip vial; the result should fall within this range. If not, please read the instructions again and repeat the control solution test.
The control solution range printed on the test strip vial refers to the control solution only. It does not refer to blood glucose or beta-ketone levels.
Blood test
To reduce the risk of infection:
- never share a lancet or finger prick;
- always use a new sterile lancet. Lancets are single-use;
- avoid using hand lotions, oils, dirt or residue on the lancets and lancing device.
Massaging the puncture site before blood collection to stimulate blood flow has a significant impact on the blood glucose level obtained. Blood collected from an unmassaged site has a significantly different glucose concentration than blood collected from a massaged finger.
Before you begin, wash and dry your hands. Select the puncture site on your fingertip. Clean the puncture site with a cotton swab soaked in 70% alcohol and allow it to air dry. Massage the puncture site for about 20 seconds before pricking yourself.
Press the tip of the lancing device firmly against the underside of your finger. Press the button to prick your finger; a click indicates that the prick is complete. Choose a different place to prick your finger each time you test. Repeated pricking in the same place may cause pain and blisters. It is recommended to discard the first drop of blood.
Insert the test strip into the meter to turn it on. Wait for the device to display the test strip and the drop symbol. Select the desired measurement mode by pressing "M".
Use the adjusted lancing device to perform the finger prick. Collect the first drop of blood using a clean cotton swab. The minimum amount of blood required by the device is 0.5 microliters (mcL) for glucose and 1 mcL for beta-ketone. Gently press the puncture site to obtain another drop of blood. Do not press the puncture site on the test strip. Be careful not to stretch the blood sample.
Remove the drop of blood from the absorbent channel of the test strip. The confirmation window should be completely filled if enough sample has been applied. Do not lift your finger until you hear a beep.
If you do not apply a blood sample to the test strip within 3 minutes, the meter will automatically turn off. You must remove and reinsert the test strip to start a new test.
The confirmation window must be filled with blood before the device will begin the countdown. Never try to add more blood to the test strip after it has already been applied. Throw away the used test strip and perform another test with a new strip. If you have trouble filling the confirmation window, please contact your doctor or Customer Service for assistance.
The blood test result will be displayed after the device counts down to zero. The results will be stored automatically.
Remove the tape by pressing the eject button on the side. The device will automatically turn off after the tape is removed.
Used lancets and test strips are a biohazard. Please dispose of them carefully according to local regulations.
Maintenance and cleaning
To replace the batteries, make sure the instrument is turned off. Press the edge of the cover and lift it up to remove it. Remove the old batteries and replace them with two new 1.5V AAA alkaline batteries. Close the battery cover. If the batteries are inserted correctly, you will hear a beep.
Replacing the batteries does not affect stored test results. As with all small batteries, they should be kept out of reach of children. If swallowed, consult a doctor immediately. Batteries may leak if not used for a long period of time. Remove the batteries if you do not intend to use the device for a long period of time (e.g. 3 months or more). Dispose of batteries in accordance with local regulations.
To clean the outside of the meter, use a cloth dampened with water or a neutral detergent, then dry the device with a soft, dry cloth. Do not rinse with water. Do not use organic solvents to clean the instrument.
warnings
Use the appliance only for its intended purpose, as described in the user manual.
Do not use accessories not specified by the manufacturer.
Do not use the appliance if it is not working properly or if it is damaged.
This device is not intended to treat any symptoms or diseases. The measured data is for informational purposes only. Always consult your doctor when interpreting the results.
Before using the device to perform blood glucose testing, read all instructions carefully and practice performing the test. Perform all quality control checks as instructed.
Keep the device and blood glucose testing supplies out of the reach of children. Small objects such as the battery cover, batteries, test strips, lancets, and vial caps are a choking hazard.
Use this device in a dry environment; in particular, the presence of synthetic materials (synthetic clothing, carpets, etc.) can cause harmful electrostatic discharges, which can lead to incorrect results.
Do not use the instrument near sources of strong electromagnetic radiation, as this may interfere with its proper operation.
Proper maintenance and regular testing with control solutions are essential for the longevity of the device. If you are unsure of the accuracy of the measurement, please contact Customer Service.
Avoid strong impacts or dropping the instrument.
The used measuring device must be treated as a contaminated object that may present a risk of infection during measurement. The batteries in the used device must be removed and the instrument must be disposed of in accordance with the regulations in force.
Touch the test strip with clean, dry hands. Use the test strip immediately after removing it from the vial. Do not use test strips after the expiration date. This may result in inaccurate results.
Do not bend, modify, or cut a test strip in any way. Keep the test strip vial out of the reach of children as the cap and strips may be a choking hazard. If swallowed, seek medical attention immediately.
Conservation
Store the instrument at a temperature between -20°C and 60°C, with a relative humidity below 95%. Avoid direct sunlight and high humidity.
Store test strips in a cool, dry place away from direct sunlight and heat (2-30°C). Do not freeze. Store test strips only in the original vial. After removing a strip from the vial, close the vial cap immediately. The strips are valid until the expiration date on the unopened package.
Store the control solution tightly closed at temperatures between 2°C and 30°C. Do not freeze.
Shelf life after opening (control solution): 3 months.
Format
Contain:
- counter;
- test strips;
- control solution.
Code 3800501
Features
| Product code | 616773 |
| Category | Tests for general use, Tests, Useful kits, Products from Across Europe, Products from Italy |
| Delivery from | Italy |
Complete instrument vtrust td-4279
Complete instrument vtrust td-4279
Delivery from Italy
Italy 
 30 Sep - 5 Oct
30 Sep - 5 Oct

 Guaranteed delivery from Italy: 30 September - 5 October
-
£39.20Delivery: £5.99 (free from £49)
Delivery from Italy:
30 September - 5 October
-
 Pay securely with your preferred payment method









£3 off your first order from £39 with promo code APP3
Recently viewed products























Reviews

Complete instrument vtrust td-4279
 Earn £1 Reward for every review
- For each submitted and approved review you can earn £1 Reward on your Rewards Credit.
- Rewards are given once for each purchased product you have reviewed.
- You have to be authorised to receive Rewards
All reviews

There are no reviews for this product.
Thank you for your review! It has been sent for moderation.

























 Description